Flows are the legacy way to build reusable, linear identity verification journeys. They run modules in a fixed order without conditional logic or branching. We recommend Workflows for all new implementations. Flows remains fully supported, but new capabilities are being built on Workflows.
Flows are created and configured in Dashboard. In the left menu, click Flow Builder > Flows.
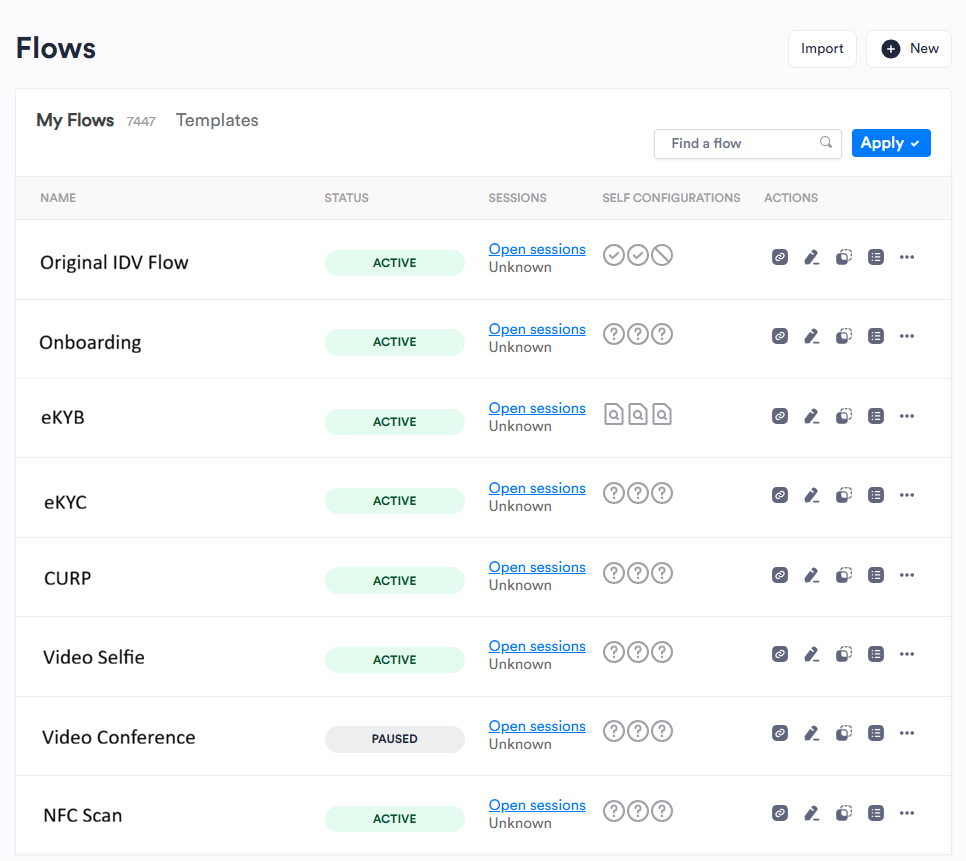
On this page, you can:
- Search the list of Flows
- Create or import new Flows
- View Sessions that used a Flow
- Copy a Flow URL or ID
- Edit a Flow
- View a list of modules in a Flow
- Pause a Flow
- Download the Flow configuration
- Delete a Flow
Create Flows
In the left menu, click Flow Builder >Flows.
Click New.
In the top left, click Edit. Enter a name for the Flow and click Save.
On the Select Modules tab, browse or search for a module you want to add. Hovering over the module name and click Add.
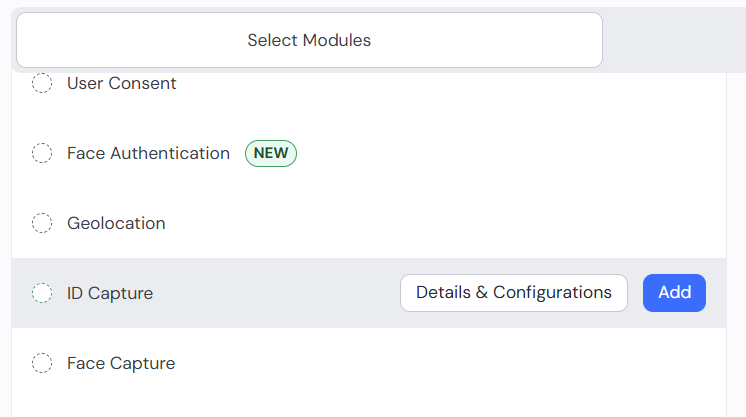
Hover over the module name and click Details & Configurations to open the configuration panel. Each module has its own settings. You can leave the default settings or customize them to meet your needs. Documentation for individual module settings is in progress.
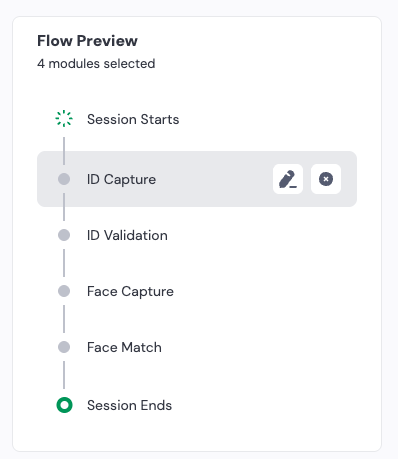
Continue adding and configuring modules to complete the Flow. Use the Flow Preview on the right to confirm the modules you added. Hover over module names to edit configurations or remove modules.
On the Settings tab, you can customize settings to meet your needs. The default settings work for most cases.
If your system is configured with Risk AI Agent or Deepsight, you can enable them for the Flow. Separate licensing is required for each. Contact your Incode Representative for more information.
Customize the Session Results settings.
Setting Description Identity creation Session Score: Pass If the session ends with Pass, you can Approve Identity creation or Send to manual review. Click Reset All to remove a selection. Session Score: Warn If the session ends with Warn, you can Approve Identity creation, Send to manual review, or Fail Identity creation. Click Reset All to remove a selection. Session Score: Failed If the session ends with Failed, you can Send to manual review or Fail Identity creation. Click Reset All to remove a selection. Session completion Optional Mark Verification as Finished On Use this drop-down to define which milestone ends the Session. You can select from the following options: ID Validation Finished, Face Validation Finished, EKYC Validation Finished, or Government Validation Finished Customize the User Experience settings.
Setting Description Default Getting Started Skip intro screen Sends users directly to verification steps, skipping the launch screen. Off Create Flow template for Onboarding Optimizer Automatically generates a reusable template based on this Flow to optimize future setups. Off Phishing Resistance Protects against man-in-the-middle phishing attacks using dynamic QR codes and device-session binding. Also enables Redirect Desktop attempts to Mobile and its sub-setting Disable SMS option. Off OAuth2 Secured (web only) Strengthens the security of the user journey against replay attacks with OAuth2 security protocol. A Redirect URL is required when this setting is enabled. The OAuth clientid is saved in the configuration settings for future reference. Off Redirect Desktop attempts to Mobile Redirects users who start the Flow on desktop to continue on their mobile device. You can configure the following sub-settings: Allow "continue on desktop" (shows users the option to continue on desktop); Redirect origin only (redirects users only at the starting point of the Flow; once they switch to mobile, the Flow ends there); Display result on desktop (shows the verification result on the original desktop tab after the mobile Flow completes); Disable SMS option (removes the SMS option and shows only the QR code to transfer the Flow to mobile). Off In person or assisted Onboarding Indicates that Sessions using this Flow will happen in person or in branch. Off Hide unsupported browser screen Lets users continue with any browser. Only Chrome and Safari are officially supported. Off After Verification Redirect URL The URL users are sent to after completing the onboarding Session. This field is required if OAuth2 Secured (web only) is enabled. Session Control Mark Session as "Expired" Labels Sessions as expired in Dashboard after the specified time of inactivity. Enter the number of minutes before a Session is marked expired. Off Allow multiple Onboarding completions Allows users to complete the onboarding Flow more than once. Off Customize the Compliance & Privacy settings.
Setting Description Default Age Verification Enhanced privacy protection Shows a privacy-adjusted tutorial. Incode doesn't save any personally identifiable information (PII) except date of birth. Off Compliance Require biometric consent Shows required consent before biometric capture for users in applicable U.S. states. Off Save verification videos Merges ID and Face Capture recordings into a single video and stores it with the Session data for audit purposes. Off Customize Cross Checks.
Customize Verification Rules.
Click Save Changes.
Import Flows
In the left menu, click Flow Builder >Flows.
Click Import.
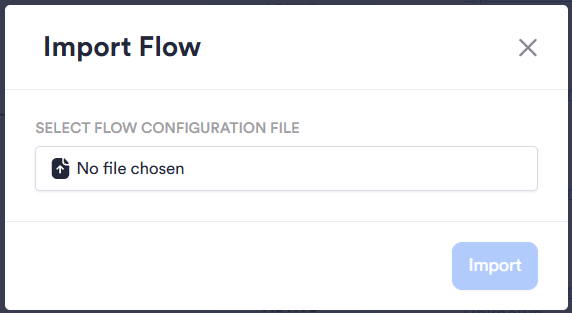
Click Select Flow Configuration File and browse to the JSON file on your device.
Click Import.
View Sessions for a Flow
- In the left menu, click Flow Builder >Flows.
- Browse or search for the Flow you want.
- Click Open Sessions. You are redirected to the Sessions page, filtered to show only Sessions that used that Flow.
Other Flow Actions
In the left menu, click Flow Builder >Flows.
Browse or search for the Flow you want.
Select from the available options:

- Copy Flow URL: Copies the URL needed to start the Flow.
- Edit: Opens the Flow for editing.
- Copy Flow ID: Copies the unique identifier for the Flow.
- View Modules: Hover over this option to see list of modules used in the Flow.
Click Actions for more options:
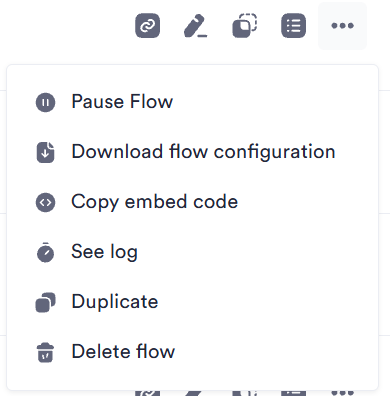
- Pause Flow: Prevents the Flow from being used in Onboarding. When a Flow is paused, the menu displays Activate Flow instead.
- Download Flow Configuration: Downloads a JSON file of the Flow configuration.
- Copy Embed Code: Copies the iFrame for the Flow to your clipboard.
- See Log: Opens a panel showing the change history for the Flow. You can select a date range or view all history.
- Duplicate: Makes a copy of the Flow.
- Delete Flow: Permanently deletes the Flow. This cannot be undone. In the confirmation dialog, click Confirm.