The Custom Module pauses a Workflow and hands control to your application, which runs custom logic and returns a result that determines how the Workflow continues.
Warning
The Custom Module requires an SDK integration to function. The steps on this page cover Dashboard configuration only: adding the module to a Workflow, referencing the callback function name from your SDK, and configuring Conditions to branch on the result. The callback that resumes the Workflow is implemented in your SDK code. See SDK Reference for those instructions.
For an overview of this module and how it works, see Custom Module.
Supported with:
✅ Workflows | ❌ Flows
Add Custom Module to Workflows
- In the left menu, click Flow Builder > Workflows.
- Click New or select an existing Workflow.
- From the Modules list, drag and drop the Custom Module into the builder.
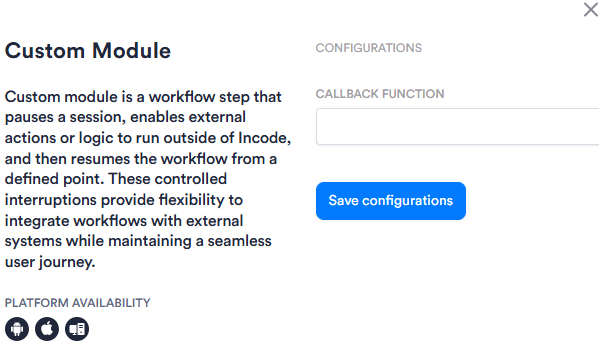
- Click the three dots > Edit on the module node to open the Configuration Options panel and adjust settings as needed.
Configuration Options
After making changes, click Save configurations to apply them.
| Setting | Description |
|---|---|
| Callback Function | The name of the callback function in your SDK integration that Incode invokes when the Workflow reaches this module. The value is a string and must exactly match the function name implemented in your SDK integration. Your callback must return onSuccess, onFail, or onUnknown to advance the Workflow. If no result is returned, the Workflow remains paused. |
Add Conditions
Conditions let you branch the Workflow based on a result. Your SDK callback must return one of three results: onSuccess, onFail, or onUnknown. Your Workflow should define a distinct path for each. A common pattern is to route onUnknown to a step-up such as ID Capture or manual review, instead of treating it the same as onFail.
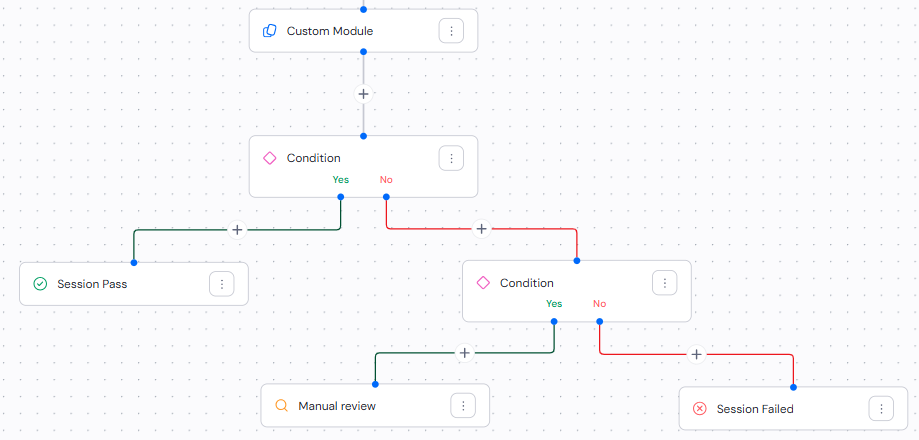
The steps below walk through one example configuration: two Conditions in sequence, with onSuccess routing to Session Pass, onFail routing to Session Failed, and onUnknown routing to Manual Review. This is one valid approach; you can structure the Conditions, result nodes, and step-up behavior differently to fit your use case.
1. Condition for onSuccess
The following steps detail the Condition configuration for the onSuccess path.
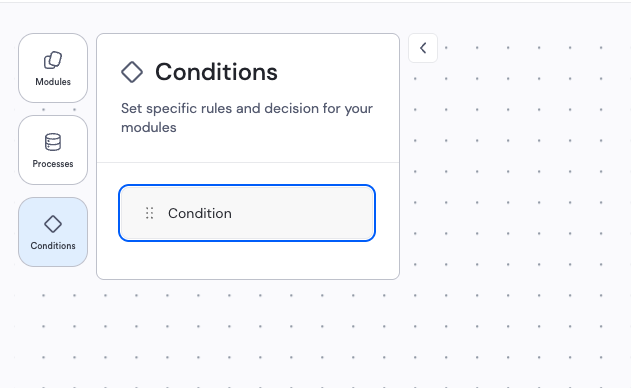
Drag a Condition into the builder from the left panel. Place it directly after the Custom Module node.
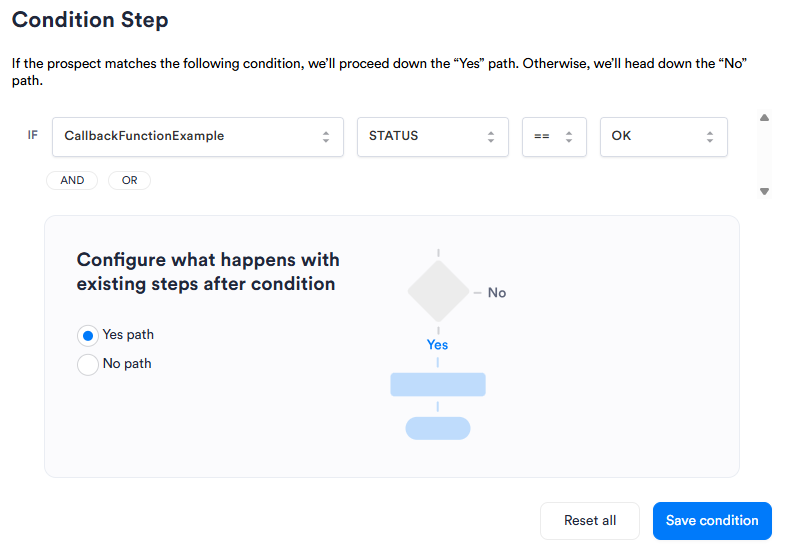
In the first drop-down, search for and select your Callback Function name.
In the second drop-down, select Status.
Keep the third drop-down set to ==.
From the final drop-down, select OK. This corresponds to an
onSuccessresult.Select the Yes path radio button. This routes the Workflow along the Yes path when the callback returns
onSuccess.Click Save condition.
Note
Example
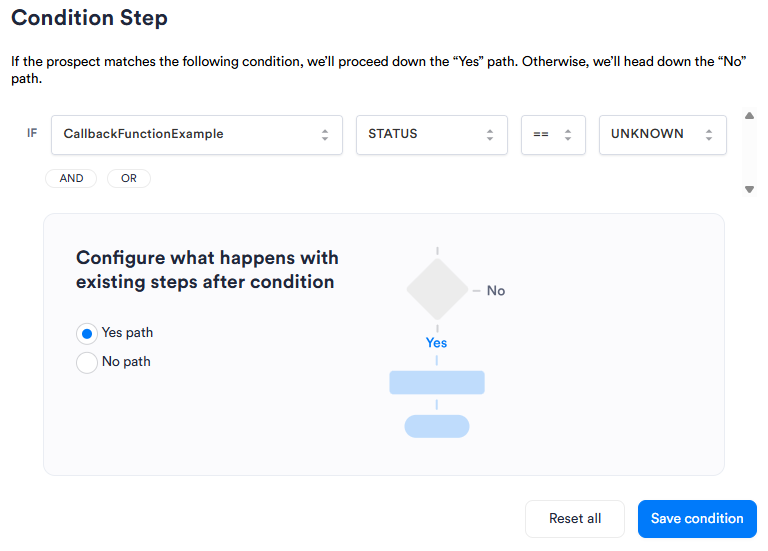
2. Condition for onFail and onUnknown
The following steps detail the Condition configuration for the onFail and onUnknown paths.
- Drag a second Condition into the builder. Connect it to the No side of the first Condition, before the result node.
- In the first drop-down, search for and select your Callback Function name.
- In the second drop-down, select Status.
- Keep the third drop-down set to ==.
- From the final drop-down, select UNKNOWN. This corresponds to an
onUnknownresult. - Select the Yes path radio button. This routes the Workflow along the Yes path when the callback returns
onUnknown. - Click Save condition.
Note
Example
By default, both the Yes and No paths of the second Condition connect to a Session Failed result node. Update the Yes path result node to reflect your step-up flow:
- Click the three dots on the result node connected to the Yes path of the second Condition.
- From the Select Decision menu, select Manual Review.
- Click Update Decision.
Note
Example
Following this configuration, your Workflow builder should look like this: