Use this tab to customize the look and feel of your verification Flow or Workflow, the finish screen content, and your organization's email template.
Configure the User Interface
This section controls the visual appearance of the screens in your verification Flow or Workflow.
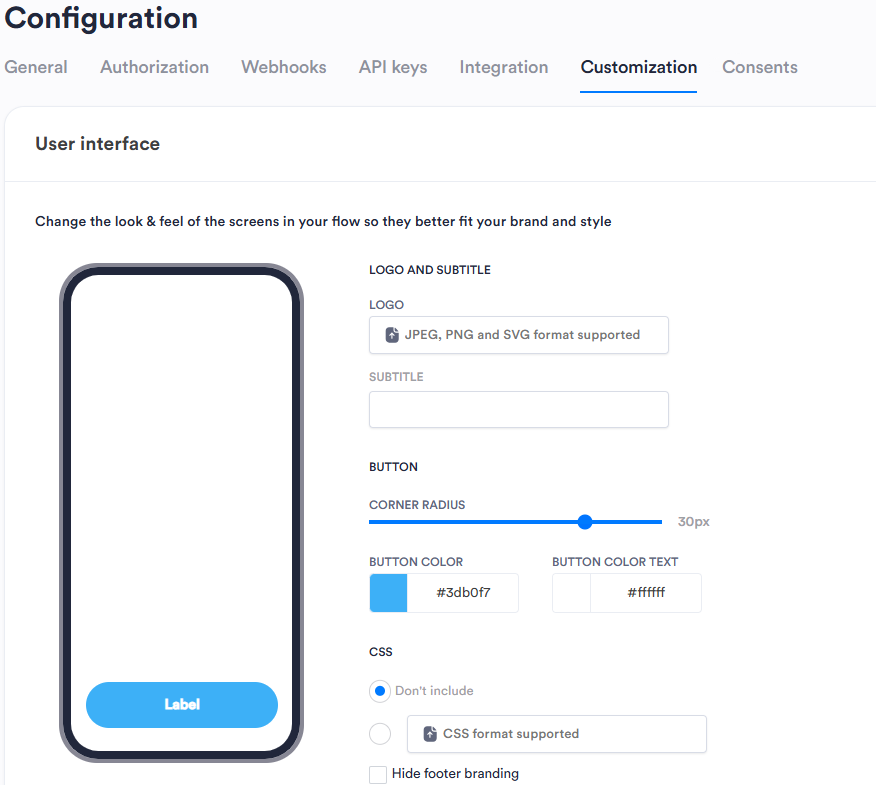
- In the left menu, click Configuration.
- Click the Customization tab.
- Under Logo and Subtitle, upload a logo.
- Click the Logo upload area.
- Select a JPEG, PNG, or SVG file.
- Enter a Subtitle to appear under the logo.
- Under Button, drag the Corner Radius slider to set the button's corner roundness. The value is shown in pixels.
- Click the color swatch next to Button Color to set the button background color. Enter a hex value or use the color picker.
- Click the color swatch next to Button Color Text to set the button label color. Enter a hex value or use the color picker.
- Under CSS, select one of the following:
- Don't Include: Uses default styles.
- CSS Format Supported: Upload a CSS file to apply custom styles.
- To hide the Incode branding in the footer of your Flow and Workflow screens, select Hide Footer Branding.
- Click Update UI.
To reset your changes, click Reset to Incode Defaults.
Configure Finish Screen Content
This section controls what customers see when they complete a verification Flow or Workflow.
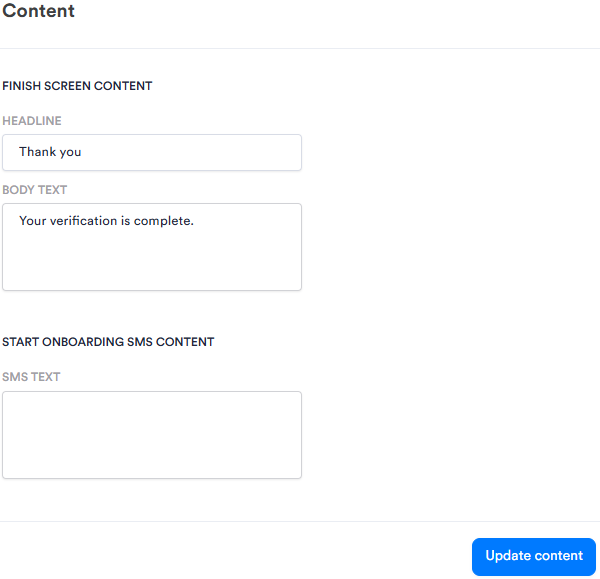
- In the left menu, click Configuration.
- Click the Customization tab.
- Scroll to the Content section.
- Under Finish Screen Content, enter a Headline. This is the title shown on the finish screen. For example, Thank you.
- Enter Body Text. This is the message shown below the headline on the finish screen. For example, Your verification has been completed.
- Under Start Onboarding SMS Content, enter SMS Text. This is the message sent to the user when their onboarding session starts.
- Click Update Content.
Configure the Email Template
This section controls the signature of emails sent from your organization.
- In the left menu, click Configuration.
- Click the Customization tab.
- Scroll to the Email Template section.
- Upload a logo:
- Click the Logo upload area.
- Select a JPEG, PNG, or SVG file. A preview of the logo appears on the left under Preview.
- Enter a Display Name. This is the sender name shown in emails from your organization.
- Click Update Email Template.