This tab shows information about all the consents in your system. Consents obtain the user's permission to collect and process their data. Incode includes a default consent, but you can create and customize additional consents to fit regulatory requirements. On the Consents tab, you can:
- Add new consents
- Edit existing consents
- Delete existing consents
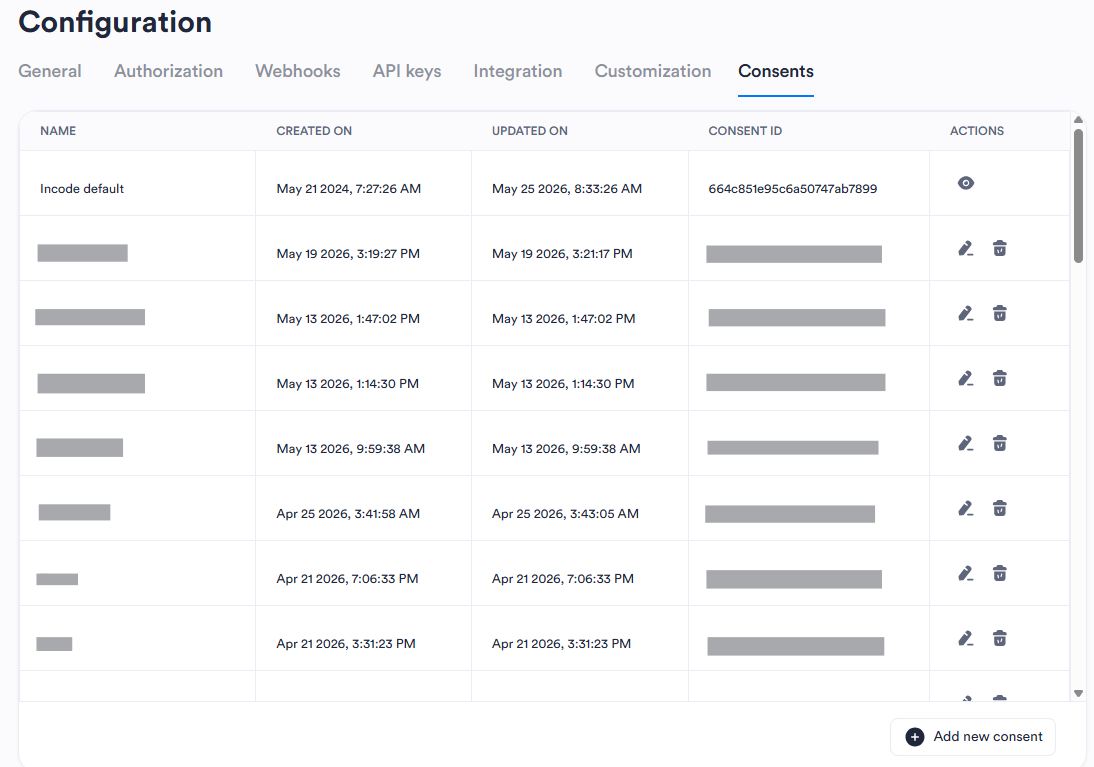
The following table describes the fields in the Consents table.
| Field | Description |
|---|---|
| Name | Consent name defined when it was created. |
| Created On | Date and time the consent was created. |
| Updated On | Date and time the consent was last updated. |
| Consent ID | Unique identifier for the consent. |
| Actions | Provides icons to Edit or Delete the consent. |
Add a New Consent
- In the left menu, click Configuration.
- Click the Consents tab.
- Click Add New Consent.
- Enter a name for the consent in User Consent, then click Add New Consent.
- Select a Language for the consent from the drop-down.
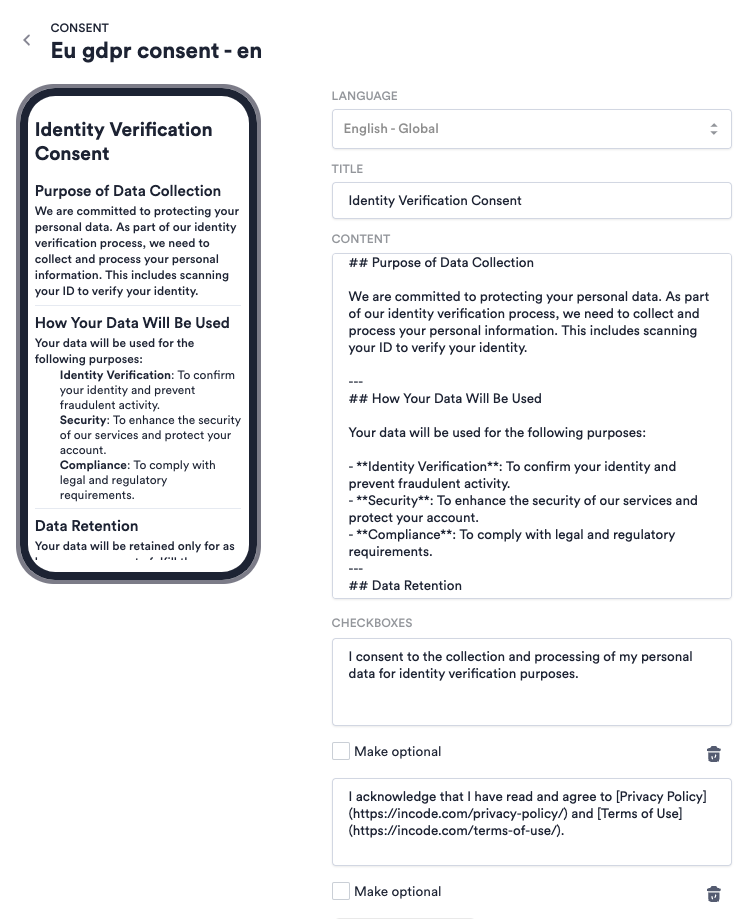
- Enter a Title and the text Content. Use HTML or Markdown to format the text. Use the live preview at the top to check the final output.
View supported Markdown and HTML Tags
- Hyperlinks:
[DISPLAY_TEXT](https://your.link.com)- Emphasis:
<strong>for strong importance or bold text, and<em>for emphasized or italic text. - Headings:
<h1>,<h2>,<h3>for heading levels, with<h1>being the largest. - Paragraphs:
<p>defines a paragraph. - Line Breaks:
<br>inserts a line break. - Horizontal Rule:
<hr>represents a horizontal line. - Lists:
<ul>for unordered (bullet) lists,<ol>for ordered (numbered) lists, and<li>for list items in both. - Markdown Shortcuts:
*for bullet points*text*for italic text**text**for bold text#,##,###for headings
- Emphasis:
- Under Checkboxes, enter the text you want to display next to the first checkbox. Select Make Optional to allow users to continue without selecting the checkbox. You can Delete the checkbox.
- Click Add Checkbox to add another checkbox. All checkboxes you add display above the mandatory data and privacy consent provided by Incode.
- Click Save New Consent Language.
- Use the Default Consent drop-down to select which configured language for the consent should be the default.
- Click Add Language depending on your needs. Repeat steps 5–9 for each new language you add.
- Click Save Settings.
View an example consent
Edit an Existing Consent
In the left menu, click Configuration.
Click the Consents tab.
In the Actions column for the consent you want to edit, click Edit.
To change the name of the consent, enter a new value in Consent Name.
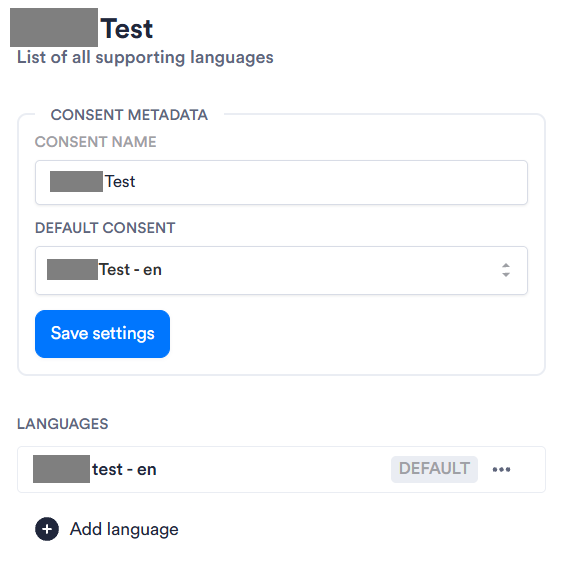
To change the default language of the consent, select a new language from the Default Consent drop-down.
To add a new language to the list of available languages for this consent:
- Click Add Language.
- Select a Language from the drop-down.
- Enter a Title and the text Content. Use HTML or Markdown to format the text. Use the live preview at the top to check the final output.
Supported Markdown and HTML Tags
- Hyperlinks:
[DISPLAY_TEXT](https://your.link.com)- Emphasis:<strong>for strong importance or bold text, and<em>for emphasized or italic text. - Headings:<h1>,<h2>,<h3>for heading levels, with<h1>being the largest. - Paragraphs:<p>defines a paragraph. - Line Breaks:<br>inserts a line break. - Horizontal Rule:<hr>represents a horizontal line. - Lists:<ul>for unordered (bullet) lists,<ol>for ordered (numbered) lists, and<li>for list items in both. - Markdown Shortcuts: -*for bullet points -*text*for italic text -**text**for bold text -#,##,###for headings
Under Checkboxes, enter the text you want to display next to the first checkbox. Select Make Optional to allow users to continue without selecting the checkbox. You can Delete the checkbox.
Click Add Checkbox to add another checkbox. All checkboxes you add display above the mandatory data and privacy consent provided by Incode.
Click Save New Consent Language, then click the < icon in the upper left corner of the Edit pane.
Click Save Settings.
Delete Existing Consent
Danger
Deleting a consent permanently deletes all associated language consents.
- In the left menu, click Configuration.
- Click the Consents tab.
- In the Actions column for the consent you want to delete, click Delete.
- In the confirmation dialog, click Delete.