In v1, the ID Capture experience begins with a simple tutorial slide followed by a native camera permission request. Once granted, the user enters the capture flow with minimal guidance. Instructions are limited to small tooltip-like titles inside a gray section box, with no dynamic feedback, onboarding messages, or additional support during document alignment.
In v2, the experience introduces a richer and more supportive flow. The tutorial screen includes an animated illustration that sets expectations for the capture process. Camera permission is handled through a dedicated bottom sheet that explains why access is needed before invoking the system dialog. Once in the capture experience, the user sees clear on-screen instructions, supported by a timed guided animation (shown after ~10 seconds, fully configurable) that demonstrates how to properly position their document. Live cues provide real-time textual feedback paired with small illustrations, ensuring users receive immediate guidance when alignment or capture conditions need correction.
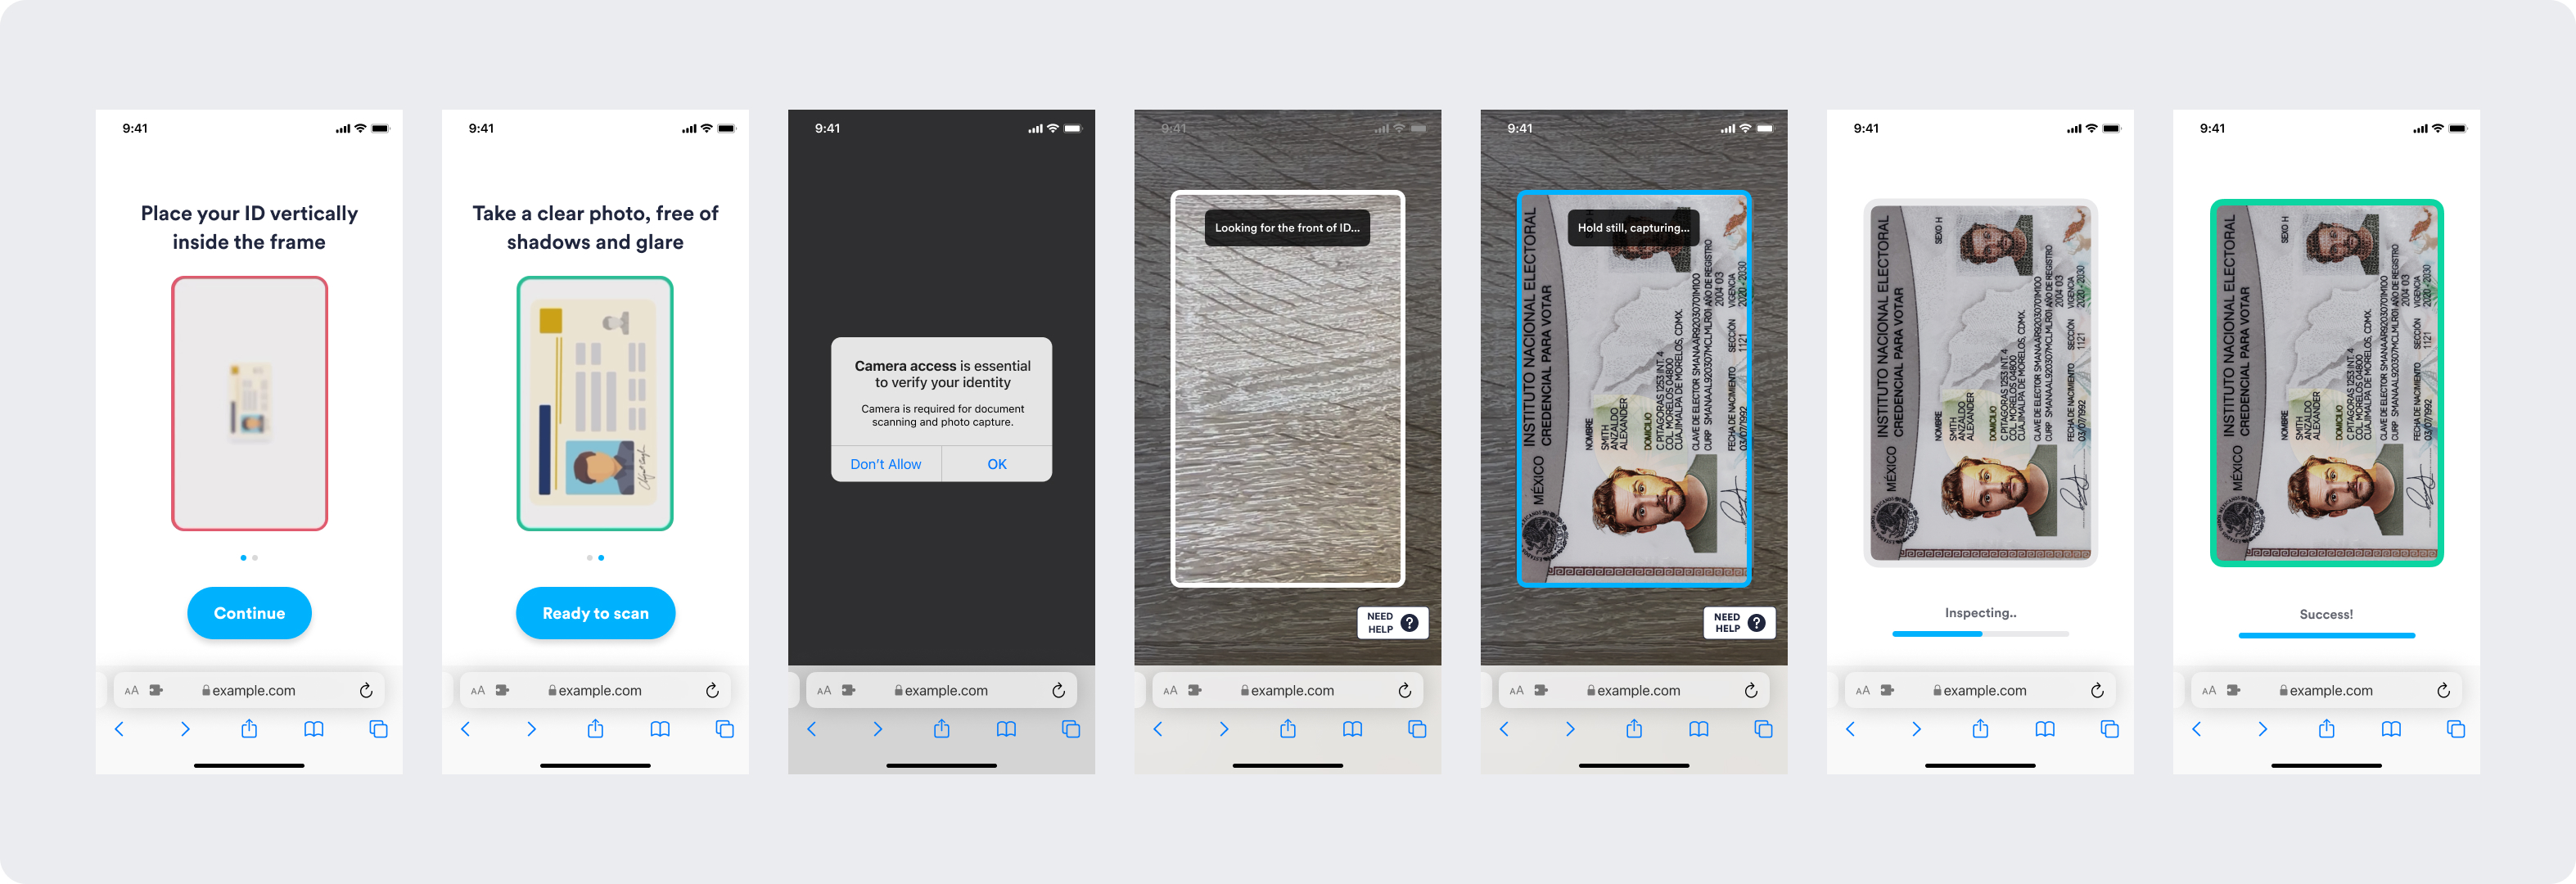
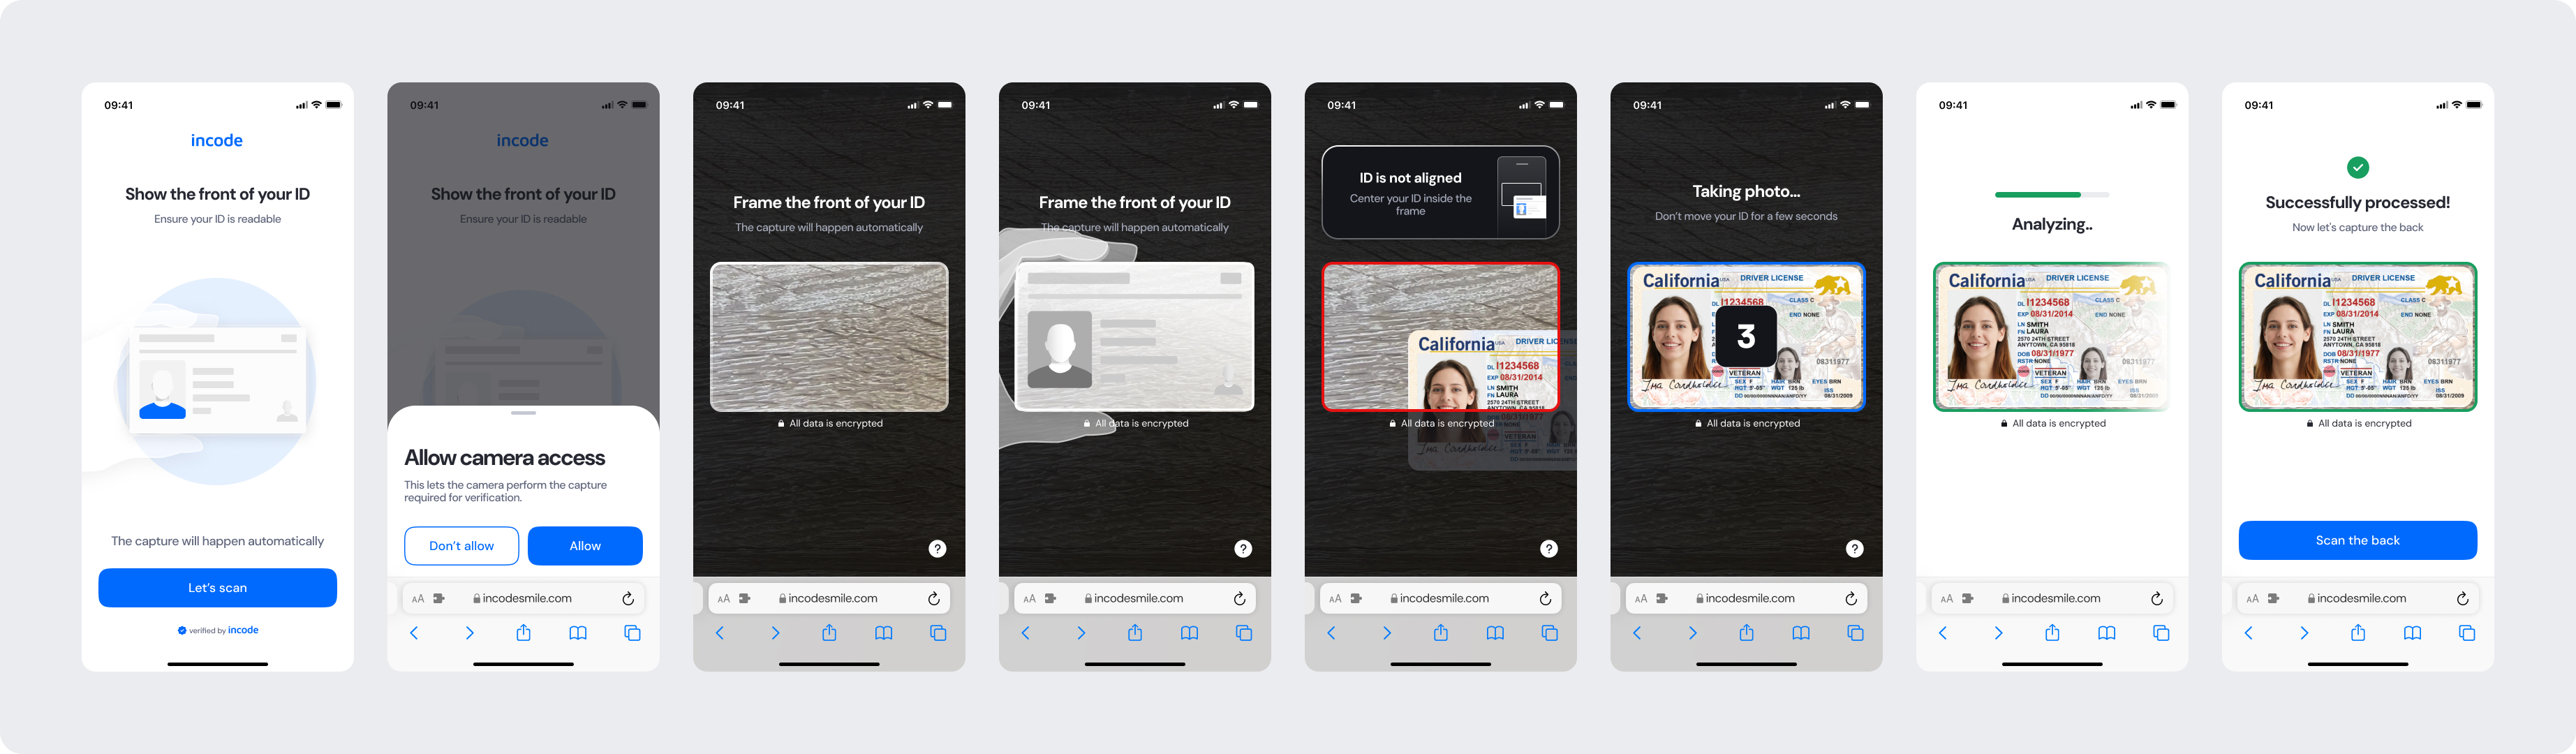
Feature Comparison
Functional capabilities of the module (objective features only; no UX or performance differences).
| Capability | V1 | V2 | Notes |
|---|---|---|---|
| Auto-capture | ✔️ | ✔️ (improved) | V2 introduces faster, more reliable detection for automatic capture. |
| Supported document types | ID, DL, Passport, PoA | Expanded (incl. barcode scanning) | V2 adds barcode scanning capabilities. |
| Guidance timer | ✖️ | ✔️ | V2 supports configurable timed guidance (e.g., animation after 10s). |
| Dynamic live cues | ✖️ | ✔️ | V2 includes real-time textual + illustrated feedback; V1 shows static tooltips only. |
| Permission flow behavior | Direct native permission popup | Pre-permission logic + native popup | V2 introduces an intermediate step explaining why permission is required (behavioral difference). |
| Customization options | Limited | Full customization | V2 allows full control over text, colors, buttons, illustrations, and behavior. |
| Documentation completeness | Minimal (key screens only) | Full module documentation | V2 provides complete, standardized documentation coverage. |
| Error states | Basic | Basic (no new logic) | Error handling behavior remains the same between versions. |
| Developer events / callbacks | Unchanged | Unchanged (no confirmed additions) | No known new callbacks or event changes in V2. |
Behavior Differences
How the module behaves during runtime.
| Behavior | V1 | V2 | Notes |
|---|---|---|---|
| Tutorial behavior | Static slides with minimal instruction | Animated tutorial explaining the process | V2 sets clearer expectations and prepares user for capture flow. |
| Permission flow logic | Immediate native popup is triggered | Pre-permission bottom sheet shown before native popup | V2 introduces an explanatory step to reduce permission drop-off. |
| In-capture guidance | Only short static tooltips inside gray area | Continuous, clear instructions displayed on screen | V2 actively guides the user instead of relying on passive hints. |
| Timed guidance behavior | None | After ~10s (configurable), a guided animation appears | Helps users correctly position their ID if they struggle initially. |
| Live feedback cues | None (no dynamic feedback) | Real-time textual messages paired with small illustrations | V2 helps users correct issues such as misalignment or framing. |
| Behavior during auto-capture | Basic auto-capture triggers with limited feedback | Improved auto-capture with alignment detection and feedback | V2 provides more consistent capture results with clearer state awareness. |
| Post-capture flow | Immediate capture with no intermediate processing screen | Shows “Taking photo…” → “Analyzing…” → success confirmation | V2 communicates system activity, reducing uncertainty. |
| End-of-flow behavior | Camera simply closes or proceeds silently | Explicit success screen with next-step guidance | V2 provides clarity, especially for multi-step document capture. |
Performance Improvements
Differences in efficiency, speed, stability, and quality of output.
Customization Overview
Customization in V2 is significantly simpler and more consistent across modules.
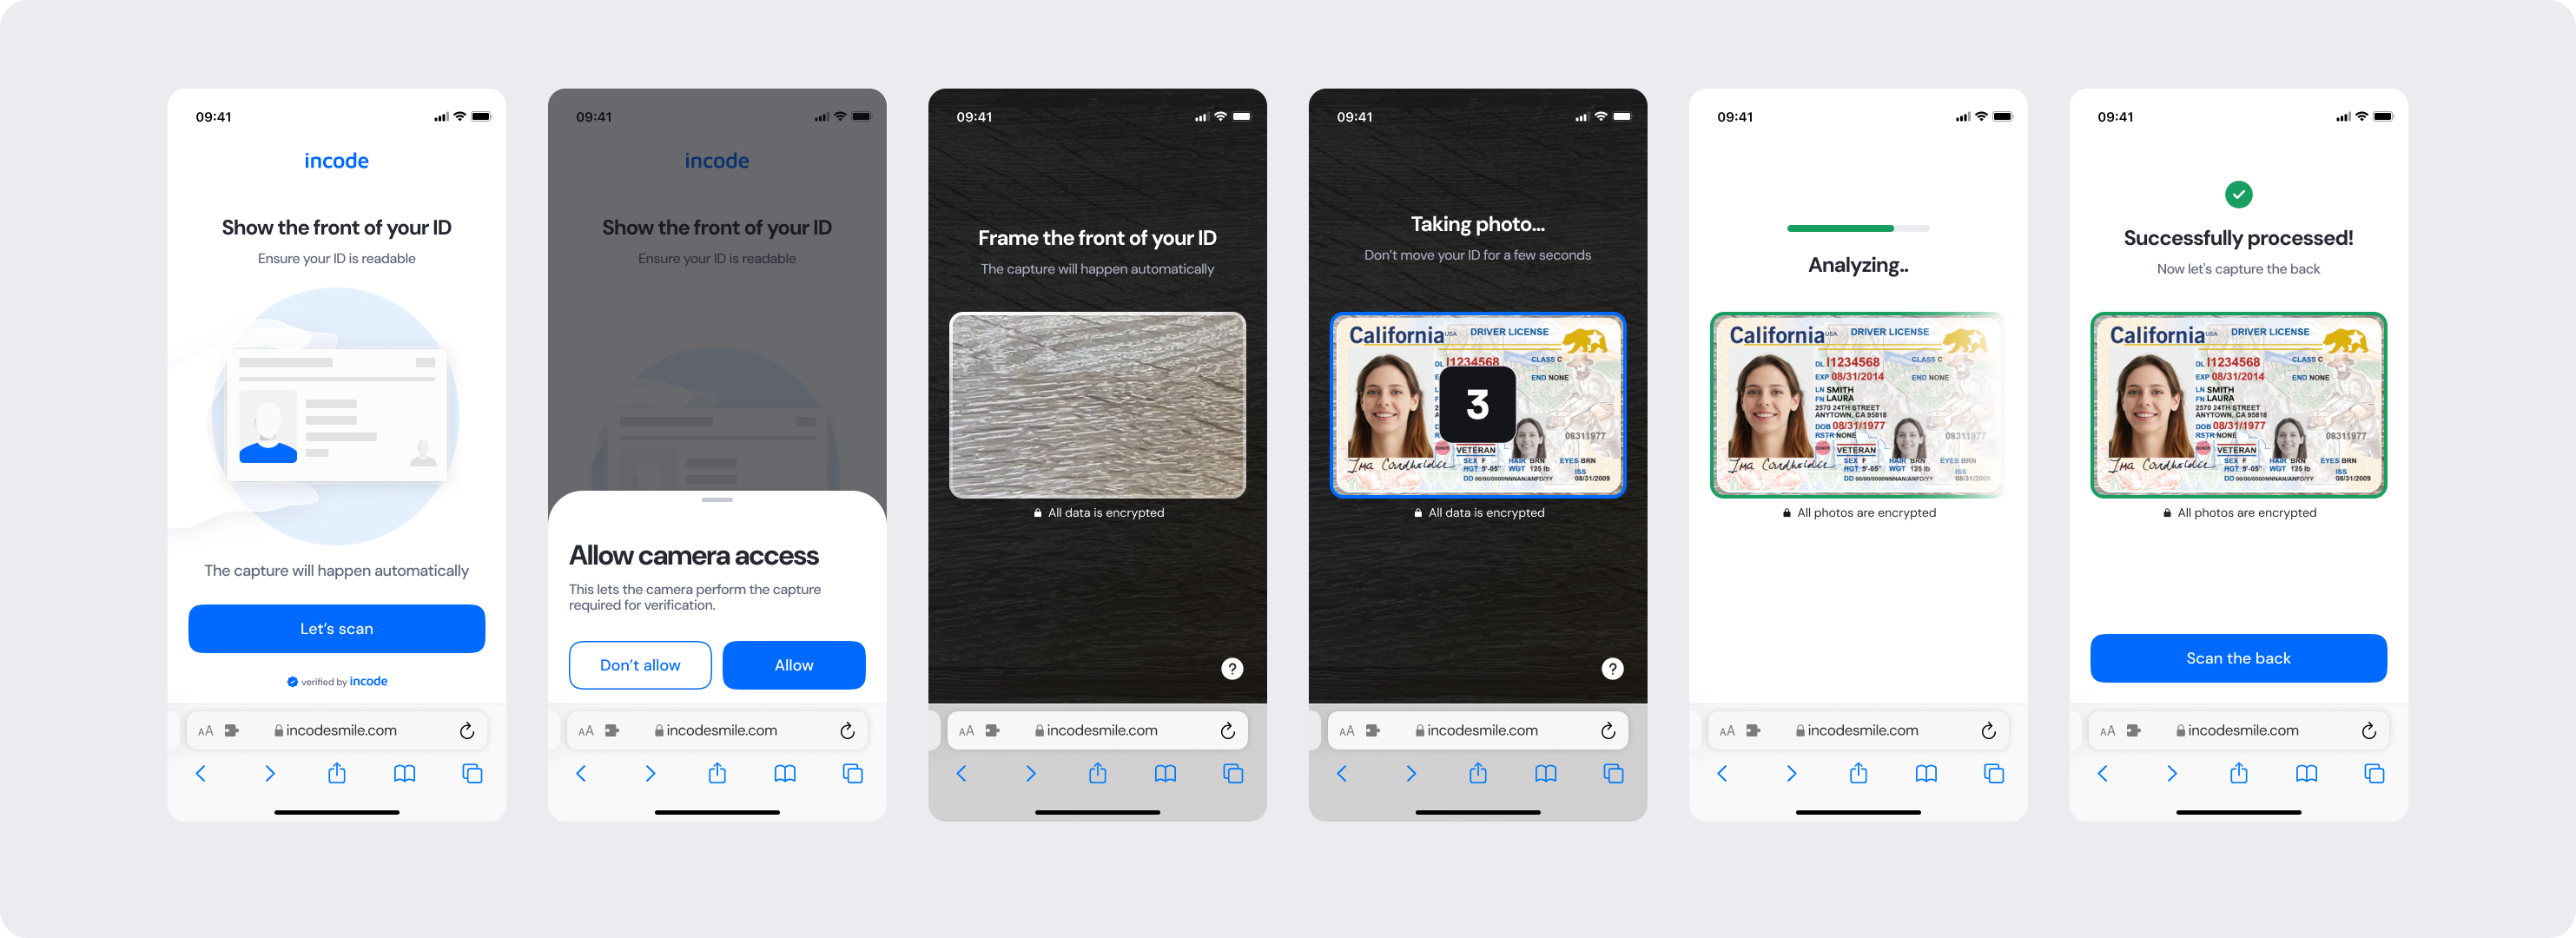
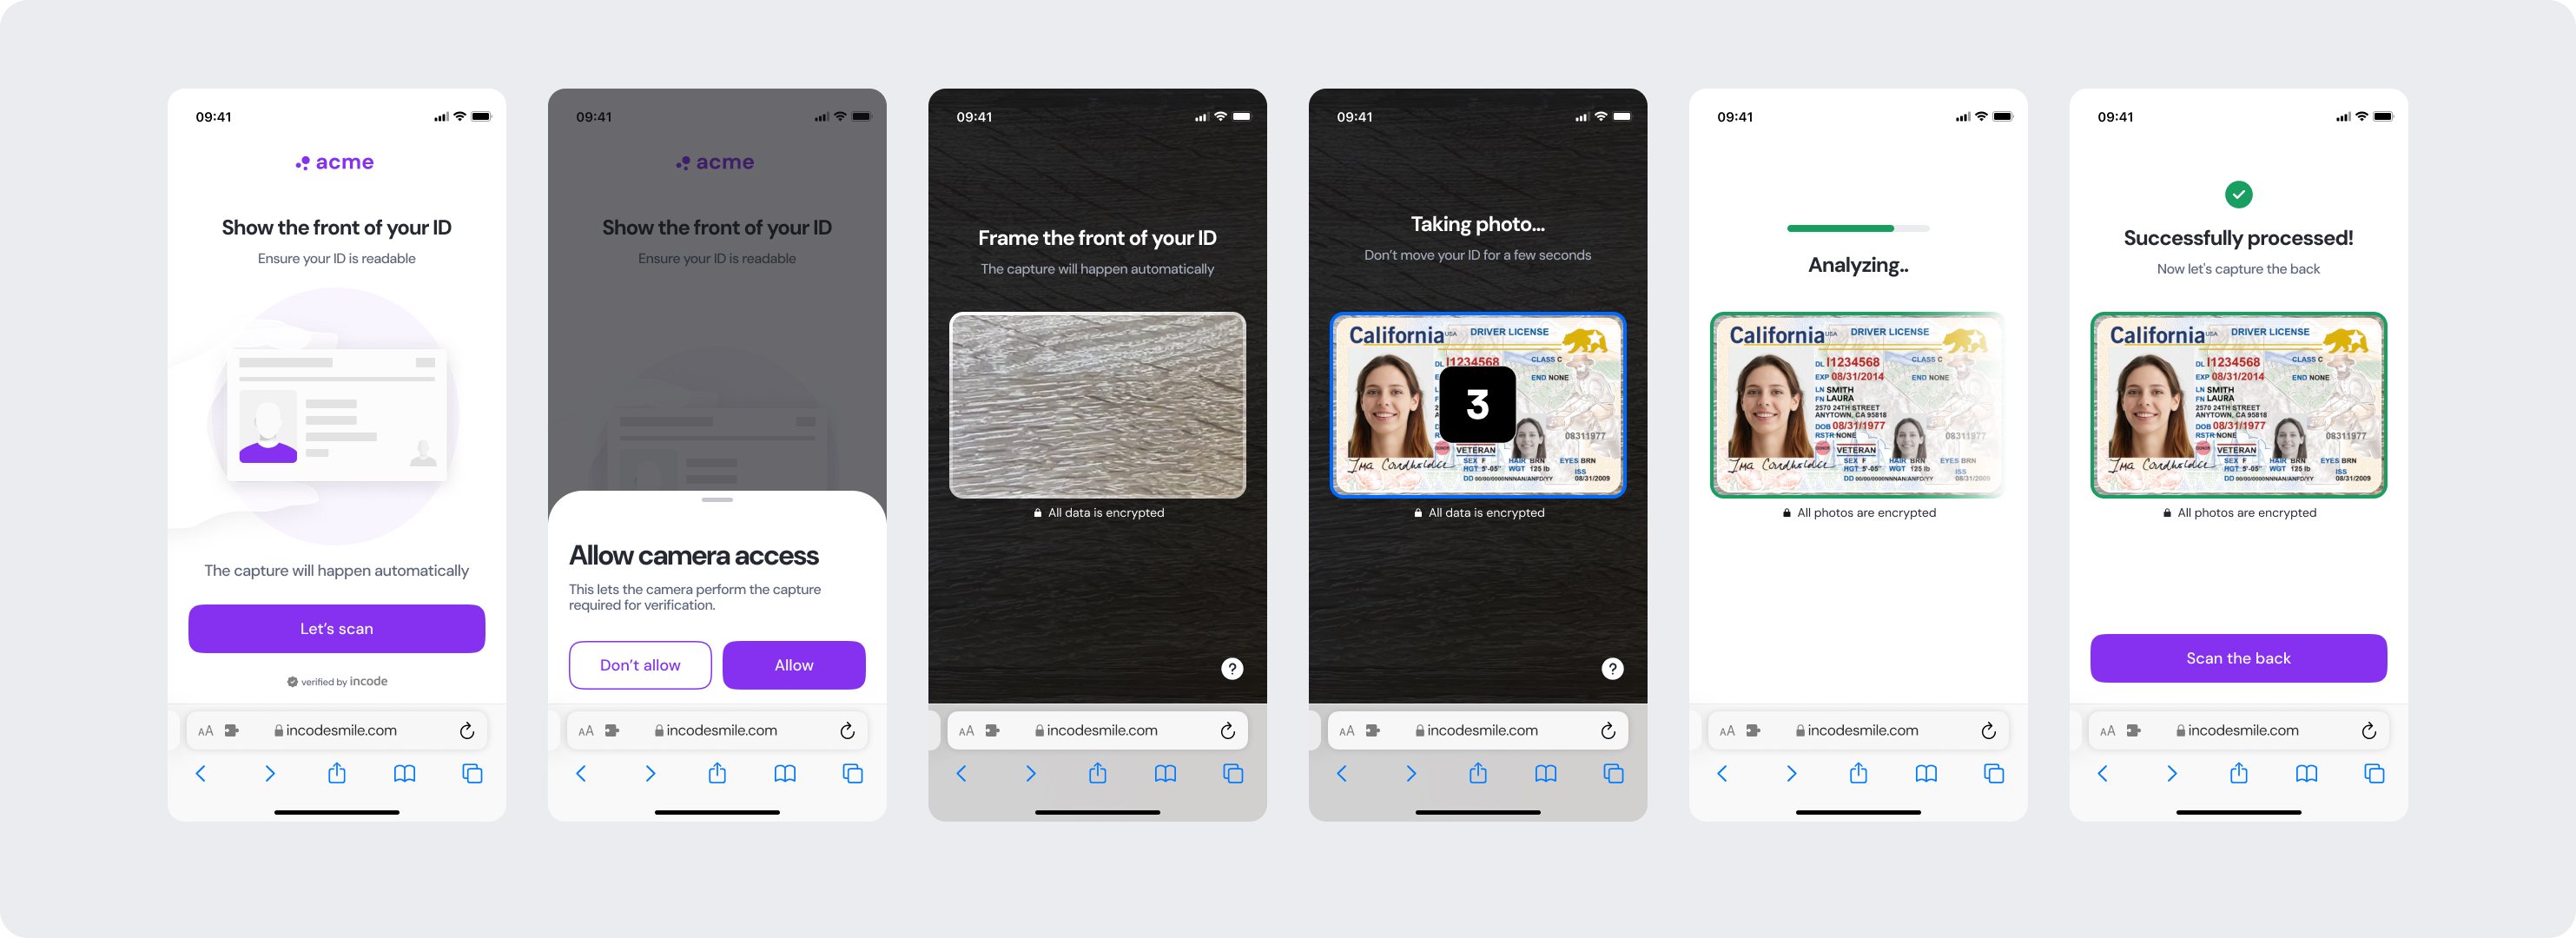
Instead of having isolated configuration options per screen or component, V2 uses a unified token-based system that allows developers to control visuals, behaviors, and experience patterns with fewer parameters and predictable outcomes.
This means:
- Less engineering work to override UI elements
- Consistent branding across modules
- Predictable behavior when changing settings
- Reduced risk of breaking flows
- Clear separation between visual tokens and experience configuration
V2 also centralizes all customization options under a single structure, so developers always know where to look and what they can modify.
For full details, visit the Customization tab of this module.