The General tab in Configuration lets you establish Dashboard and organization settings. This tab displays by default when you click Configuration.
On the General tab, you can:
- Configure Dashboard settings
- Configure Authentications settings
- Configure SSO redirect URL
- Manage custom fields
- Manage Proof of Address (POA) fields
- Configure manual review options
- Manage custom event types
Configure Dashboard Settings
You can configure one or all of the Dashboard settings described in this task.
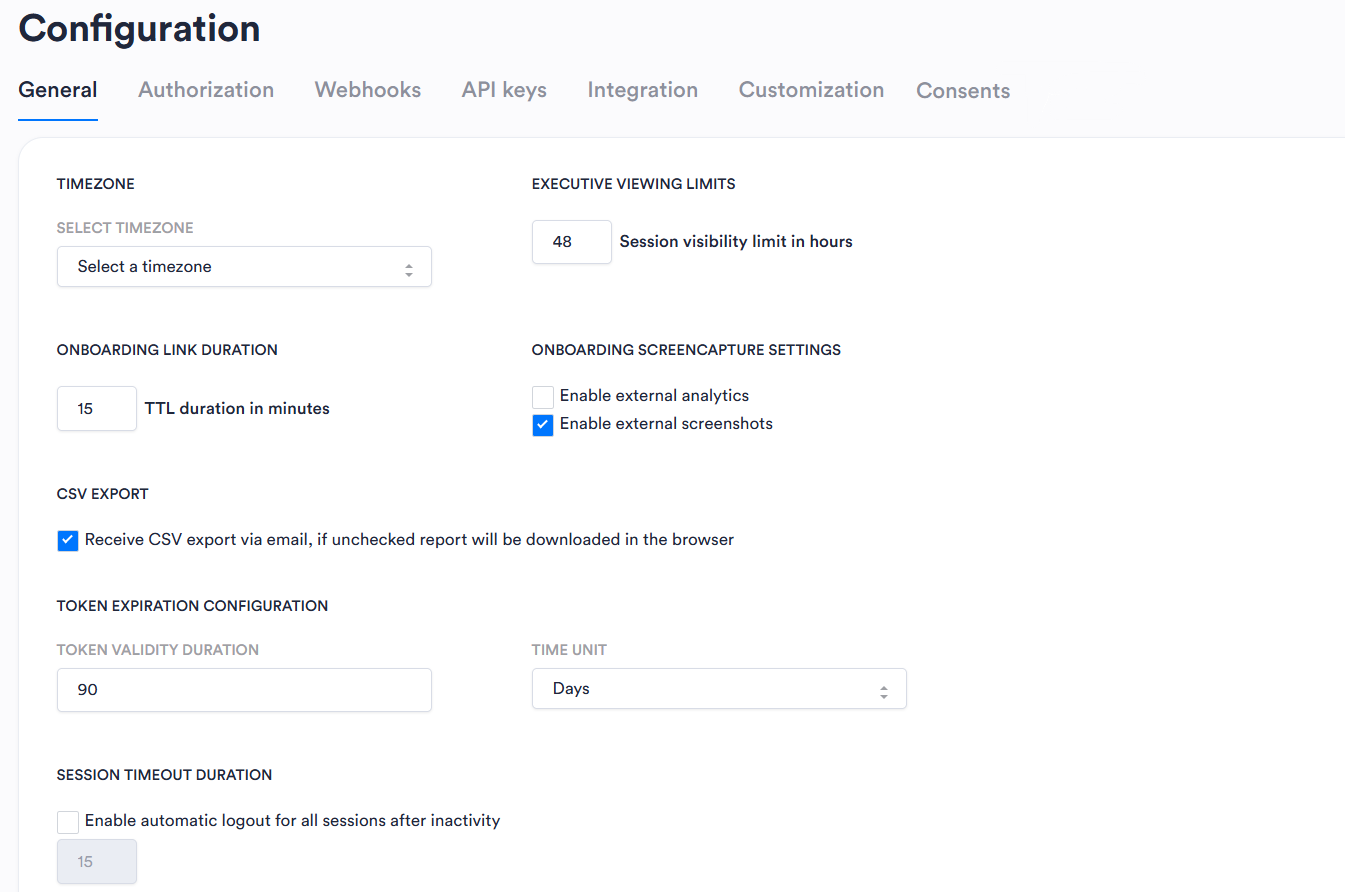
Expand for setting details
| Setting | Description |
|---|---|
| Select Timezone | Sets the time zone for your organization's Incode implementation. |
| Executive Viewing Limits | Sets how long a user with the Executive role can view Session data. When a Session's age is greater than the number of hours, it is no longer available to that user. |
| Onboarding Link Duration | Sets the length of time in minutes for which an onboarding link is valid and available to the customer. The maximum value is 24 hours (1,440 minutes). |
| Onboarding Screen Capture Settings | Enable external analytics and Enable external screenshots. |
| CSV Export | Lets you specify whether exported CSV files are sent to an email address or downloaded to the location configured in the user's browser (this is the default). |
| Token Expiration Configuration | Token Validity Duration and Time Unit work together to determine the length of time a token is valid before expiring. Enter a number for Token Validity Duration, then use the Time Unit drop-down to select Minutes, Hours, Days, or Months. |
| Session Timeout Duration | Allows you to configure a period of time after which all Dashboard sessions are automatically logged out. The minimum value in minutes is 10 and the maximum is 30 . |
In the left menu, click Configuration.
Under Timezone, use the drop-down to Select timezone.
Under Executive Viewing Limits, enter a numeric value or use the increase/decrease icons to set the Session visibility limit in hours.
Under Onboarding Link Duration, enter a numeric value or use the increase/decrease icons to set the TTL duration in minutes.
Under Onboarding Screencapture Settings, select the checkbox to Enable external analytics, Enable external screenshots, or both.
Select the checkbox for CSV Export if you want exports to be delivered by email.
Under Token Expiration Configuration, enter a numeric value in Token Validity Duration and select a Time Unit from the drop-down. You must configure both settings.
Enter a numeric value for Session Timeout Duration to specify when sessions automatically log out after inactivity.
If you are finished making changes, scroll to the bottom of the page and click Update Organization.
Configure Authentications Settings
If you're not using Incode for Authentications, you don't need to configure these settings.
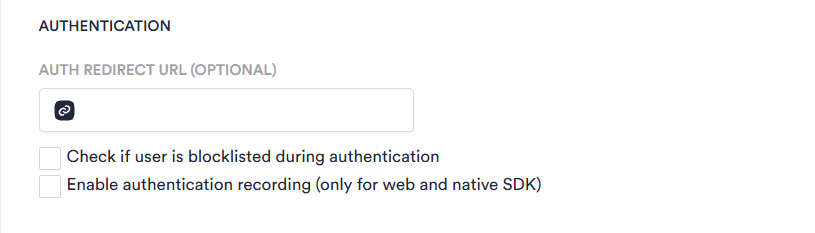
Expand for setting details
| Setting | Description |
|---|---|
| Auth Redirect URL | Sets a global URL Authentications are redirected to if you are not using the Incode default. You can also choose to enable one or both of these settings: - Check if user is blocklisted during authentication - Enable authentication recording |
| Check if user is blocklisted during authentication | |
| Enable authentication recording |
In the left menu, click Configuration.
Under Authentication, enter a URL for Auth Redirect URL.
Select the first checkbox if you want to Check if user is blocklisted during authentication.
Select the second checkbox if you want to Enable authentication recording.
If you are finished making changes, scroll to the bottom of the page and click Update Organization.
Configure SSO Redirect URL
If single sign-on (SSO) is not enabled for your Dashboard users, you don't need to configure this setting.
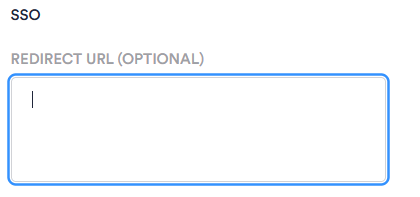
- In the left menu, click Configuration.
- Under SSO, enter a valid Redirect URL for your SSO page.
- If you are finished making changes, scroll to the bottom of the page and click Update Organization.
Manage Custom Fields
If you're incorporating custom fields into your Incode Onboarding sessions, you must configure them here. The Custom Fields module is only available for Flows.

Expand for more setting details
| Setting | Description |
|---|---|
| Custom Field Name | The name of the field as you want it to appear to customers. |
| Custom Field Type | You can choose from these types of custom fields: Integer (the field accepts only whole numbers), Double (the field accepts decimal numbers), String (the field accepts alphanumeric values exactly as they are entered), Boolean (the field accepts only yes or no values), and Date (the field accepts dates in the Custom Field Format you specify). |
| Custom Field Format | This field is enabled only if you select date for Custom Field Type.You can choose from these formats for your custom date fields: - yyyy-mm-dd - dd/mm/yyyy - dd.mm.yyyy - mm/dd/yyyy - yyyy.mm.dd - Unix_timestamp_ms - Unix_timestamp_s The first five options use common references to year, month, and date. The last two options use a standard Unix timestamp. |
- In the left menu, click Configuration.
- Under Custom Fields, click the plus sign (+) to create a new custom field.
- Enter a Custom Field Name.
- Select a Custom Field Type from the drop-down.
- If you selected date, select a Custom Field Format from the drop-down. Otherwise, this field is unavailable.
- If you are finished making changes, scroll to the bottom of the page and click Update Organization.
Manage POA fields
This section applies and is mandatory only if your onboarding Flow or Workflow captures power of attorney (POA) documents and extracts information from them using optical character recognition (OCR).
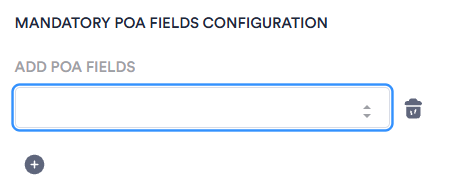
- In the left menu, click Configuration.
- Under Mandatory POA Fields Configuration, click the plus sign (+) to create a new POA field.
- Select a field from the Add POA Fields drop-down.
- If you are finished making changes, scroll to the bottom of the page and click Update Organization.
Configure Manual Review Options
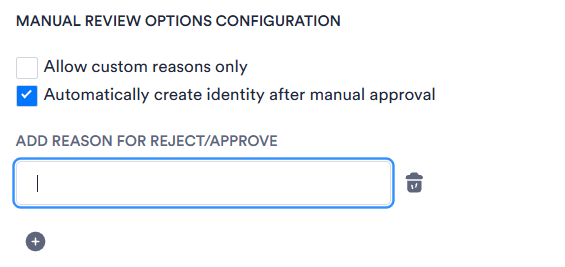
This section lets you configure settings that apply when an onboarding session requires manual review. You can also populate a list of reasons for onboarding rejection, approval, or both.
In the left menu, click Configuration.
Under Manual Review Options Configuration, select the checkbox if you want to Allow custom reasons only.
Select the checkbox if you want to Automatically create Identity after manual approval.
If you want to Add Reason for Reject/Approve:
Click the plus sign (+).
Enter a value in the text box.
If you are finished making changes, scroll to the bottom of the page and click Update Organization.
Manage Custom Event Types
Expand for more setting details
| Setting | Description |
|---|---|
| Add Custom Event Type |
In the left menu, click Configuration.
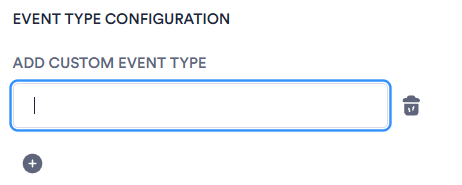
Under Event Type Configuration, click the plus sign (+).
Enter a name in Add Custom Event Type.
If you are finished making changes, click Update Organization.